Steve Johnson Modelmaker
|
|
Class 120 Swindon Cross Country
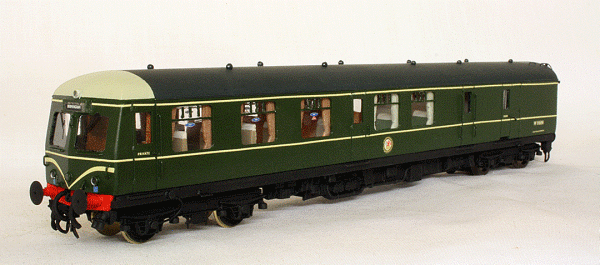
Class 120 DMBC Swindon Works produced three batches of Cross Country units for both the Western and Scottish Regions from 1958 to 1961. Featuring the distinctive two window front cab style, the first two batches had small buffets in the trailer carriage. The last batch for the Western Region did not have buffet cars. However, the buffet facility was withdrawn during the mid-1970's. Front end treatment varied from four lamps to a four character headcode.
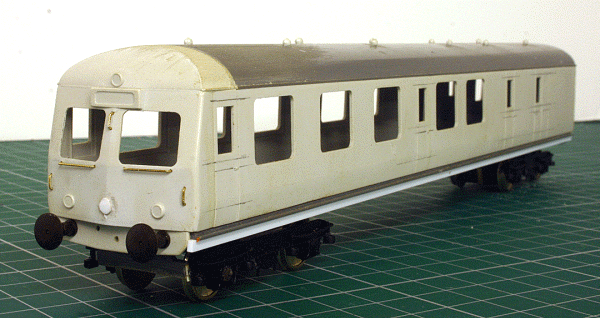
Under Construction My model is of a Western Region first batch version with the four lamps. The kit is a DC Kits plastic kit which goes together very well. Due to a house move, the model had been 'lost' in storage and has only recently come to light. So, as it was fairly well advanced, I decided to continue to finish it. The handrails on the cab front and bodysides have nearly all been added, made from 0.4mm brass wire. The solebar on the kit did not look deep enough to me and certainly too thin for mounting the footboards. Some 2mm x 1mm Evergreen strip has solved this problem. I think the DC Kits version is of the later refurbished fronts and lack the bottom centre light that the original build had. This has been added using 2mm round plastic rod. The bottom outer lights will be drilled out to accommodate some lighthouse type LED's.
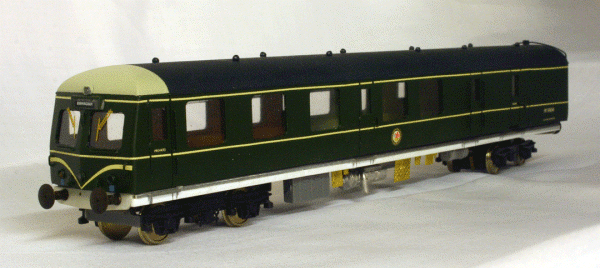
Body painted and test fitting of underframe detail Originally, I had fitted a Black Beetle motor bogie and Black Beetle wheels for the front bogies as additional pickups. However, I decided to change this to release the Black Beetle for my Derby Lightweight single car model M77990. As a replacement, I used a Hornby Class 121 motor bogie which are available as spares at a good price. This needed a modification to the chassis for a mounting point. The front bogie wheels were also changed for some DCC Concepts wheels with pick up springs fitted. The DCC decoder sits on top of the motor bogie housing with the whole assembly obscured by the brake compartment. Lighthouse LED's were fitted as marker lights and some self adhesive LED strip fitted to the underside of the roof as interior lighting. The wires for these were brought back to brake compartment and connection to the decoder is by a miniature plug and socket. Having fitted the underframe detail, I was unsatisfied with it. I managed to obtain some cast resin 'one piece' details at a good price and fitted these instead. I would prefer more relief and might change these later of if I ever get around to printing my own 3D parts. The MU jumpers are 3D printed and were kindly made for me by a friend.
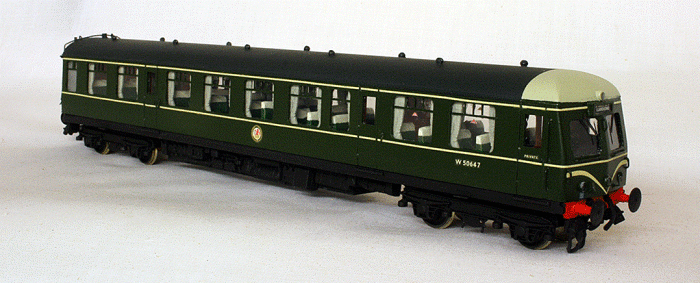
Class 120 DMS Phoenix-Precision paints were used along with Fox Transfers. The lining transfers have proved problematic inasmuch they keep breaking up whilst soaking. One bodyside waist level stripe has since partially disintegrated, despite the body being varnished. This will have to be carefully re-applied. Full interior detail is present with the seats coming from DC Kits. The 'No Smoking' and 'First' transfers are Railtec. I used these as they are reverse printed, meaning that the the glue side is the side that sticks to the window, as it should do!
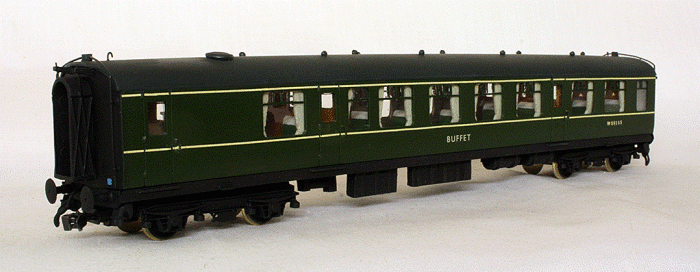
Class 120 Trailer Buffet The Cross Country units were all fitted with curtains from new. This seems to be a grey colour in Second Class and a beige colour in First Class. These were later removed apart from the First Class section were orange curtains were fitted during the Blue/Grey repaint. These were subsequently removed later. I used the MJT white metal curtains. Seats were originally green in Second Class and a Goldy/Beige in First Class. They all had white antimacassars.
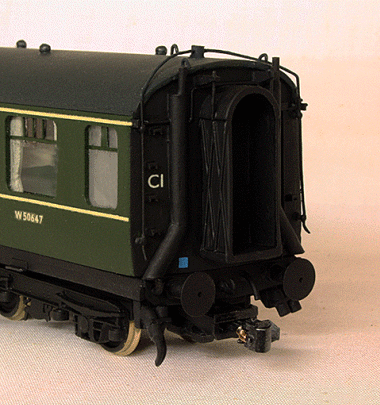
End Detail As usual, I have used Kadee couplings between cars. The cab ends use a Hornby screw link coupling. Interestingly, the Class 120's were the only Swindon units to use screw couplings, the others used buck eye couplers! I have made some effort with the end detail, although this is tricky to do as there are few photographs of the inner ends. They did use the GWR type suspended gangway and the exhaust pipes had protective cowling. There were also four steps on the left hand side for roof access. These were later removed for safety reasons. There is also a single step on the right side to enable resetting of the Emergency Cord mechanism. All cars have DCC decoders, the two non-motored cars are function only decoders to control the lighting functions. All in all, I'm fairly pleased with this unit and pleased that I have at last finished it after some 12 years of lurking around! It is a unit that will run on my layout 'Milneford'. Silver Fox Models offer a RTR version of this class as a 3 car set. DC Kits offered a kit of this class. Craftsman Models produced a conversion kit based on the Lima Class 117. MTK also offered a kit of this class. Anbrico produced a kit of this class some years ago. Heljan are producing a 7mm scale version, so it will be interesting to see if this is scaled down to 4mm.
|
