|
Back to
BR Locomotives
6 PUL, 6 COR, 6 CIT, 6 PAN, 6 TC Class 404 4 COR, 4 RES, 4 BUF, 4 GRI, 4 PUL Class 415 4 EPB, 4 COM
|
Class 504 Manchester-Bury
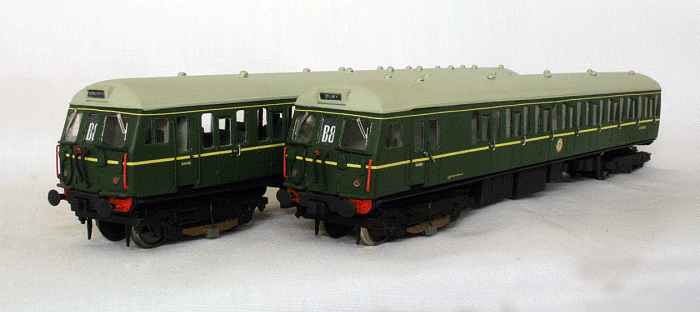
Class 504's The Class 504 2 car emu's were unique on British Railways running as they did, on the 1,200Vdc side contact system. This was an inherited system from the Lancashire & Yorkshire Railway that originally electrified the line in 1916. They were built at Wolverton Works in 1959 and replaced the original L&Y units. They followed the general pattern of emu styling used on the 25kV ac 304, 305 and 308's. The main differences, apart from the current collection method, was an additional small cab window between the main windows, initially used to display the headcode. They were all withdrawn in 1991 when the Manchester Victoria-Bury line became part of the tram operated Metrolink. The 2 car units consisted of one DMBS and one DTC, which was later altered to a DTSO. These units also featured 'Ladies Only' compartments in the DTC. One unit has been preserved at the East Lancashire Railway. My version of this class will be in original green livery, as built. DC Kits used to make a kit of these units, but as usual, I didn't buy one at the time and they are long since out of production. However, Charlie Petty of DC Kits worked his magic for me and found some cab components and Gresley bogies. Thanks Charlie!
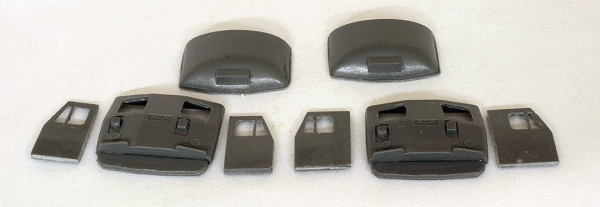
The DC Kits cab components The main bodies of the units are based on the Mk.I Suburban stock, which helps tremendously. I duly sourced two suitable bodies and underframes from Replica Railways, ever helpful in these matters. The plan here is to cut and shut the cabs and bodies together to form a two car unit. As usual, I have used the Southern Pride nylon bogie frames (P146) to which the Gresley sideframes will be attached. One thing to note here is that the DMBS bogies are different to the DTC. The DTC bogies are similar to the standard carriage bogie with an 8'6" wheelbase with 3'6" diameter wheels. The DMBS bogies however, are special motor bogie version and are an 8'9" wheelbase with 3'3" wheels. The DC Kits sideframes are all of the 8'6" variety and I have used 3'6" wheels. After all, who is really going to notice the 1mm difference with both of them?
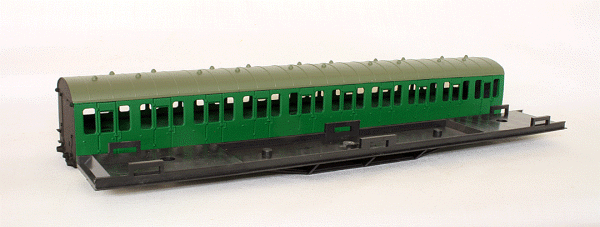
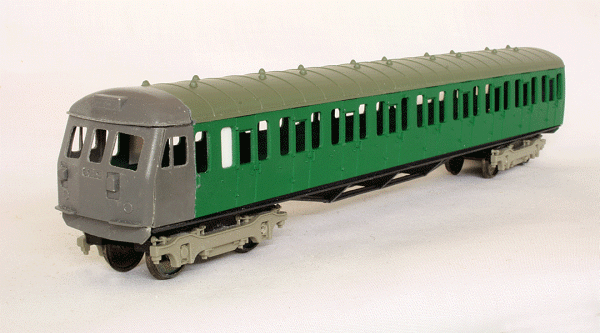
Replica Railways donor suburban coach body and underframe The cab was assembled, using the short sides, but not with the roof dome. The cab assembly was offered up to the carriage side to see where the cut needed to be made. This turned out to be along the door line of the first compartment and inner window. Cutting here meant that I could use the join as one of the door lines. The other door line would have to be carefully scribed on the other side. The cut was carefully made and the cab assembly glued into place. The roof dome needed some trimming back to fit. When done, this too was glued in place. The photograph below shows the DTC roughly assembled awaiting further work. One item noticeable in the photograph below is the badly fitting roof dome. On closer inspection, it was found to be warped, in fact both domes were. A run under a hot tap softened the plastic sufficiently for it to be straightened out before dunking in cold water to set it. The DMBS will be tackled next.
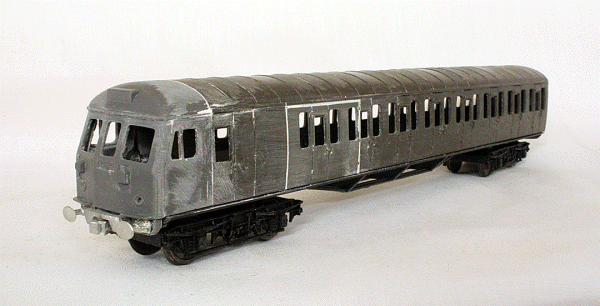
The DTC roughly assembled More work on the Class 504 saw a second Replica Railways suburban brake carriage acquired to do a 'cut'n'shut' to add the extra seating bay to the DMBS. To try and make things easy, I cut along the door lines in an effort to hide the joins. I also cut out the panel below the cantrail, leaving the carriage roof in tact. A little bit of fettling was required to get the new panel to fit nicely in the gap of the DMBS. This was then glued into place, with a bit of re-enforcing on the inside of the carriage. The joins were then filled and subsequently filed smooth. It won't be until the carriage gets its first coat of primer that I'll know if it looks any good!
The DMBS in a rough state showing the 'cut'n'shut' The other modification to do the DMBS are the guards compartment doors. Firstly, the doors nearest the cab on each side open inwards. So consequently these doors are shorter and the bottom needs to be filed back a bit. The other modification is that both doors have windows. The outline of the new window was drawn on the bodyside then drilled and filed to shape. The 'elephant in the room' with DC Kits Classes 304, 305, 308 and 504 are the cab front windows. They are not right inasmuch that they are not square and have a taper. It is a difficult thing to try and correct and needs to be to get the 'face' of the emu right. So, armed with a file, I have attempted to get the windows to the correct shape. I think I'm about there, but obviously nervous about removing too much! The destination indicator on the cab roof dome is also incorrect. It is slightly bigger and lower down. The bottom of the indicator seems to line up with the cantrail. I will tackle this a bit later. As supplied, the Replica bodies have moulded roof vents present. Unfortunately, these are all in the wrong place for a Class 504 and had to be filed off, along with the rather prominent roof ribs. They have been replaced with MJT Scallop Dome Ventilators. The positions of the domes are also different on each car. Basically the DMBS have ten vents widely staggered down the roof. The DTC has fourteen vents more closely spaced. Careful observation of photographs was useful here. Comet extended Mk.I coach buffers were glued onto the outer buffer beams along with an MJT rubbing plate with a raised MJT Buck Eye coupling underneath it. The inner ends needed the moulded buffers removed, these are not present of the Class 504. They were replaced with another rubbing plate. Coupling between cars will be by my usual Kadee knuckle couplers attached to the bogies.
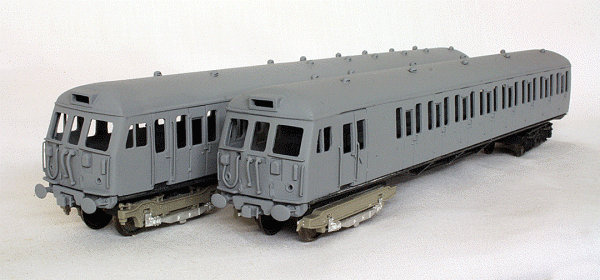
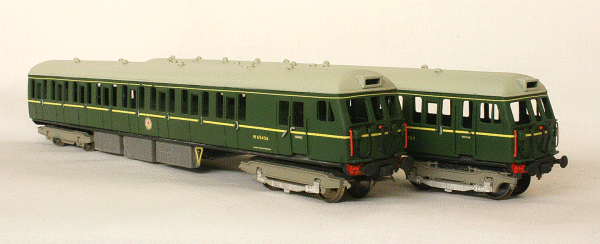
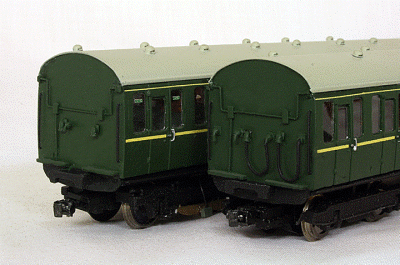
The bodies primed Front end detail was now added. This included the handrails made from 0.4mm wire. The centre hoses were modified Shawplan white metal air hoses. The MU jumper cable was made up from some 0.7mm wire. I filed out the hole where the MU cable exits the bodywork. Lamp brackets are made up of some fine brass strip. Finally, the cylindrical object under the right hand window (whatever it is?) was made from some plasticard rod. The moulded carriage rear detail was filed off and new detail, with better relief added. This included the emergency cord mechanism, grab rails and MU jumper sockets. It is much easier to see how the unit is coming along once primed, as in the above photograph. To me, it is not looking too bad and the cab windows look far better. At least you can't see the joins! Motorising the unit is the next problem. In the past, it would have been a Black Beetle, but unfortunately, these are no longer available. A Tenshodo SPUD would work, just, but I am not overly keen on the running qualities. After a bit of research I found that Loco's'n'Stuff produce a Tenshodo type motor bogie, but with much better gearing and better motor. I thought I would give one of these a try, but it turned out too expensive. In the end, I went for a Hornby Class 153 motor bogie grafted into the rear of the chassis of the DMBS. It does intrude slightly, but hopefully won't be too noticeable. The bodies were then sprayed first with Halfords Ford Laurel Green, then the roof with Halfords Ford Dove Grey. These are pretty good matches. Front handrails are picked out with orange and cables and hoses in black. Lining and BR Crest were Fox Transfers whereas numbers and other text were HMRS. The bodies were then varnished in Phoenix Precision Satin varnish.
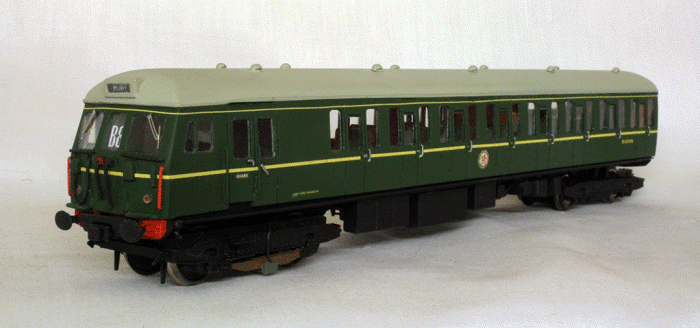
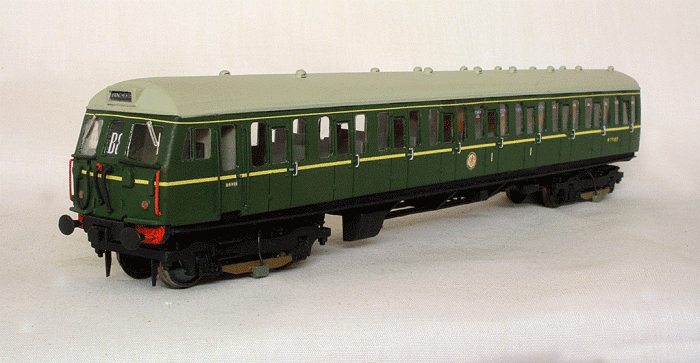
Class 504 Bodies painted and varnished Glazing and completing the underframes are next. My original intention with the glazing was to use the Replica Railways glazing units they make specifically for this carriage. An enquiry over availability revealed that the tool had been damaged and they had not yet got around to fixing it. So, to avoid a very long wait, I decided to use Shawplan Laserglaze made for the Replica carriages. These are precision laser cut windows supplied on a fret made from thin acrylic sheet. They are supposed to be an interference fit in the window aperture. I found that every single one needed to be filed down, both in width and height, in order to fit! That's a lot of windows! I'm guessing the problem here is the thickness of the paint has made the apertures a lot smaller. After all, there is primer, green paint and varnish layers. They are secured by Glue'n'Glaze in my case. It took a few days to complete the 104 compartment windows, but the result was worth it and enabled me to finally finish the model.
Rear Detail The models are fitted with DCC decoders. The DMBS decoder controls both the motor functions as well as exterior and internal lights. The DTC decoder is a function only decoder controlling exterior and interior lights.
Class 504 DMBS The tail lights are red nano SMD LED's mounted behind some 1.2mm red acrylic rod. This gives a better size for the tail lights rather than 2mm lighthouse LED's. The headcode and destination blinds were made using my home computer printer and are illuminated by white LED's. I'm pleased with the model of this unique prototype. Not sure where I'm going to run it though!
Class 504 DTC DC Kits used to make a kit of this class. 3D printed bodies are available from Recreation 21 via Shapeways. Britannia Pacific Models make a RTR model of this class in various liveries.
|
