Steve Johnson Modelmaker
|
Back to BR Locomotives
|
Barclay
D2400-D2409 0-6-0DM
The ten Barclay 0-6-0DM shunters were built between 1956 and 1957 by Andrew Barclay at their Caledonia Works in Kilmarnock. Following a similar style to their industrial range and other Barclay BR shunters, such as Classes 01 and 06, they were powered by a Gardner 8L3 engine driving the wheels via a Wilson 4 speed gearbox and jackshaft. Originally numbered 11177-11186, they were renumbered in order to D2400-D2409. Working in the Eastern Region, they were eventually all withdrawn by 1969. None survived. Out shopped in the then standard black livery, they were later repainted BR Green with yellow ends and wasp stripes. My version of this locomotive is built from a Judith Edge kit. Construction is straightforward and follows Michaels usual method of separate frames, footplate, engine casing and cab sub-assemblies, all soldered. This is also the first model that I have assembled the frames on the Poppy's Woodtech jig. This proved to be very easy and produced a nice square chassis.
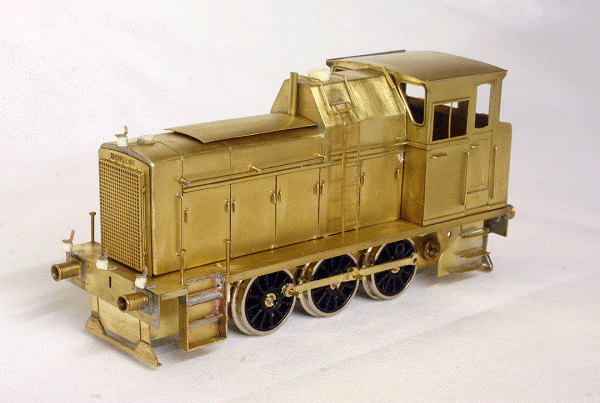
The model assembled and awaiting painting Suggested power is by a Mashima 1024 motor driving the centre axle via a Branchlines gearbox at 38:1. However, I prefer to use the High Level Roadrunner gearbox with a ratio of 60:1 to give nice slow running. Although the kit recommends Romford or Gibson 14mm wheels, I thought I would try a cheaper alternative for this build. Instead, I have used 14mm spoked wheels produced by Scalelink. These have nickel silver tyres and plastic inserts. As such, they are fully insulated, which suits me as all my builds are for use with DCC and I try to avoid a 'live' chassis. Other than that they are pretty much Romford lookalikes! They use the standard Romford quartered axle and screw fit crankpins. Care will have to be taken when I solder the retaining bosses on the end of the crankpin as excessive heat may melt the plastic inserts.
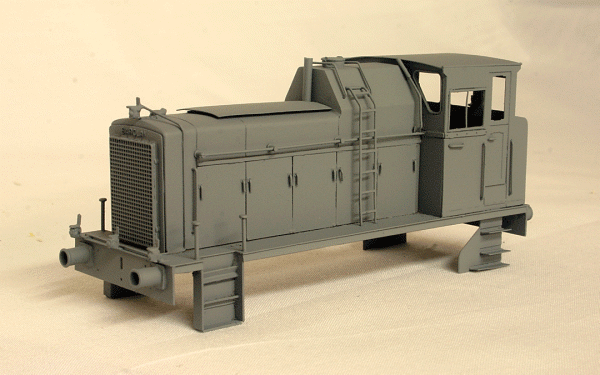
Bodywork complete and finished in grey primer As with a lot of these smaller shunters, finding a place to fit the motor is interesting. In this case, it is suggested that the motor is mounted vertically driving the centre axle. The top of the motor fits in the fuel tank area. This might work for the Branchlines gearbox, but the High Level Roadrunner doesn't fit this way. Part of the gearbox casing fouls the rear axle. So instead, I have turned the motor around so that it sits in the main engine casing behind the radiator. To do this, a small amount of the centre stiffener/fuel tank front, has to be cut away inside. A motor mount was made from some scrap brass etch and soldered onto the chassis.
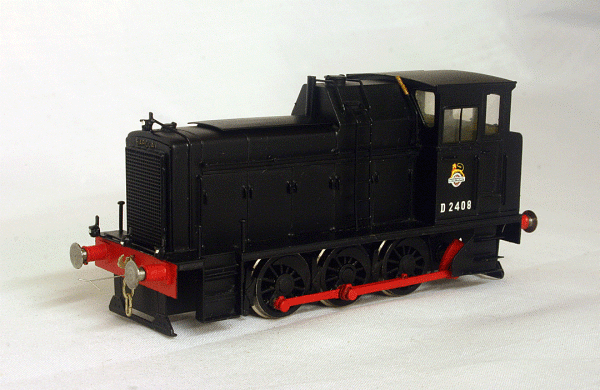
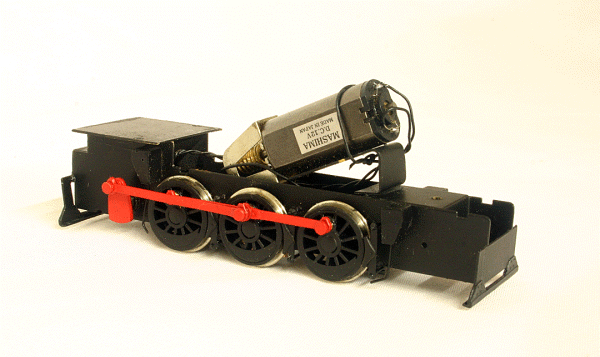
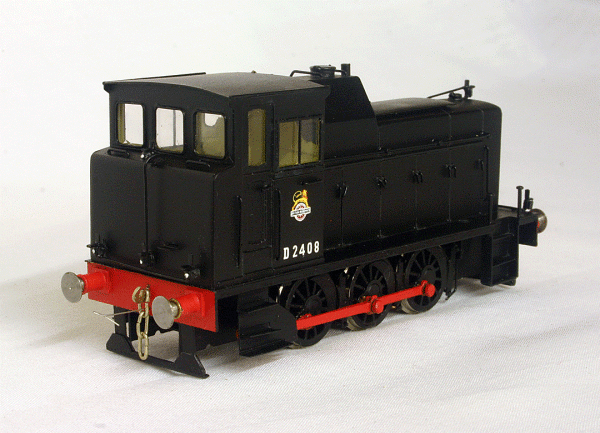
Chassis in 'DC Test' mode One tricky area is the fitting of the connecting rods and coupling rods. The coupling rods are fine, but the connecting rods pass very close to the crankpins of the rear axles. Too close to use the standard Romford retaining washer as it throws the connecting rod out too far, which then fouls the rear cab steps. Instead, I have used a small spacer washer between the coupling and connecting rods on the centre axle and a thin washer on the rear axle. The rear crankpin was then carefully filed down flush with the washer to give enough clearance. Having searched the Internet, I found a picture of D2408 in plain black with the 'Cycling Lion' crest. This avoids the problem of the green livery with wasp stripes. The stripes would have been tricky over the curved rear cab end. The model was sprayed black using Halfords Gloss black. Transfers were from Fox Transfers. The cab interior was painted cream, but there isn't any interior detail. This is because we haven't found a picture showing what the cab interior looked like. The guess is that it followed Barclay's standard pattern. When I eventually locate a picture of a Barclay interior, I will fit one. The model was then varnished with Phoenix-Precision satin varnish and glazed. Gibson sprung buffers and Exactoscale couplings were then fitted. The model is now almost complete save the works plates.
D2408 from the rear (awaiting works plates) The next step was to fit a DCC decoder. There is not a lot of room, so I decided to try another DCC Concepts ZN8H with 'stay alive'. Well, after my last experience, I should have known better. The performance was terrible and quite stuttery. I thought at first it was a problem with the pick ups, despite the chassis working fine when wired up directly for dc. In the end, I removed the decoder and replaced it with a Digitrax DZ126. The difference was remarkable! The Digitrax decoder doesn't have stay alive, but the performance is very good. The lesson for me is not to use the DCC Concepts ZN8H again. Using a spare lighting output of the decoder, I wired up a working cab light. The DZ126 only has forward and reverse light functions controlled off f(0). However, all the functions are able to be remapped. So, I reconfigured the decoder to have the yellow output wire switched from f1 and on in either direction. This is simply done by the value 2 in CV35.
|
