Steve Johnson Modelmaker
|
|
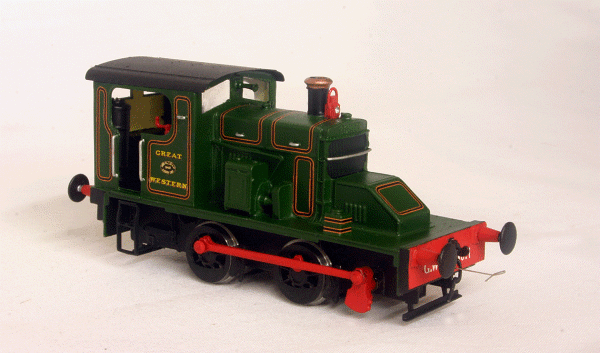
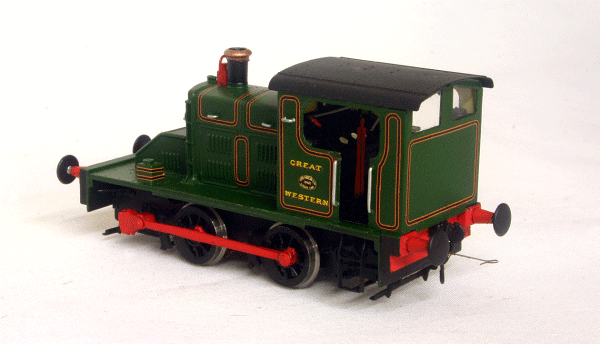
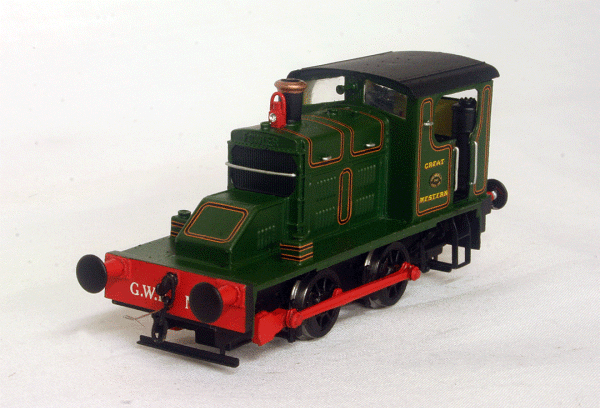
GWR No.1, 0-4-0DM
Completed Model
No.1 was a Fowler 0-4-0DM built in 1933. It was powered by a 70hp engine and was similar in appearance to LMS Departmental No.2. It was with drawn in 1940 and sold to the Ministry of Supply. I have long fancied building a model of this locomotive and fortunately, High Level Kits produced a kit in 2018. This is not a beginners kit and does require careful attention during construction. That said, it is an extremely well thought out and produced kit.
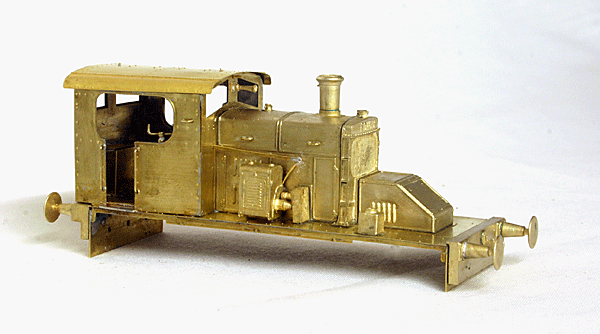
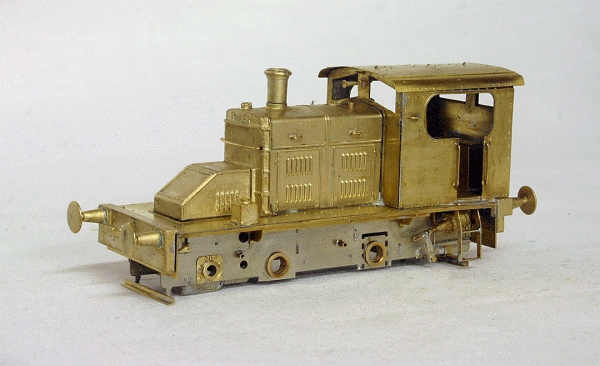
Body Assembled The cab and footplate are fabricated from brass etches with the chassis being nickel-silver. The engine casing, radiator, transmission cover and donkey engine are lost wax brass castings. This is an excellent idea as it adds extra weight to this small locomotive. The cab is formed from a folded brass etch to make a five sided box. The cab side, front and back sheets are seperate etches that are sweated onto the 'cab box'. Special location guides are provided so everything lines up. The footplate is of similar construction. With those items made, the cab is fixed to the footplate and the engine casing can be added. It is possible to solder the castings to the footplate, but this might risk some movement due to the heat required to solder the casting. A safer and easier way is to glue the engine casing, radiator and transmission cover. This is what I did using an epoxy resin adhesive.
Body and Chassis The fine details can now be added, such as the chimney, donkey engine etc., sand boxes and so on. The cab interior detail was made up and added. The cab roof is designed to be removeable to enable painting of the cab. Having formed the roof for a good fit, a folded etch is soldered on the underside of the roof located by wire pins that are removed later. With the roof in position, holes are drilled through the front and rear of the cab and through the etch soldered underneath the roof. The roof is then simply secured by using wire pushed through the cab sheets and through roof etch, The ends of the wire are trimmed and end up looking like rivet heads.
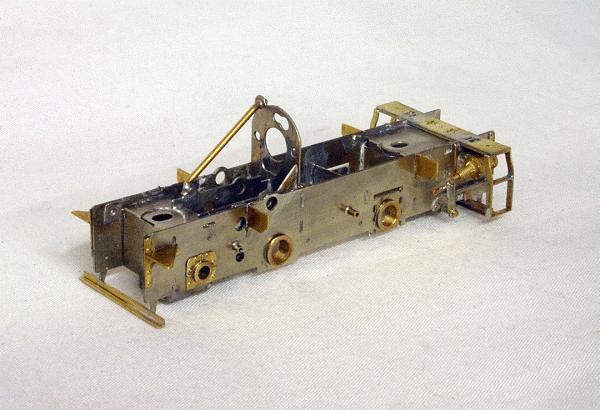
Chassis assembled The chassis contains an integral gearbox assembly with the whole lot being built as one unit. The chassis uses a version of High Level Kits 'Illusodrive' system. This is a system where the jackshaft is also driven by the motor as well as an axle to give the illusion of the locomotive being propelled by the jackshaft drive alone! The motor used is a Mashima 1020 can type driving through 108:1 gearing. The chassis can be built rigid or compensated using the hornblocks supplied. With the chassis completed, it was primed, sprayed black and varnished. Assembly of the motor and gearbox was next before fitting the wheels and rods. With the 'Illusodrive' system, the rods on this locomotive are assembled as one piece. The front wheel has no connection to the rods, it is driven by a spur gear from the gearbox with the jackshaft being driven by another spur gear and so the rear wheels. The advantage of this system is that it gets around the problem of very tight clearances between the coupling rod, connecting rod and wheel. When in motion, the wheels look as if they are all driven from the jackshaft, hence the name, 'Illusodrive'. Very clever and very effective. Next came painting the body. The painting scheme was quite complex for what was really a works shunter in lined GWR locomotive green. The body was first primed and then sprayed green. The beams were painted red. The orange/black/orange lining is from Fox Transfers with sheets FRH4050/2 and FRH4050/3 being used. It was quite time consuming getting all those corners right! One point here with the lining. The Ixion O Gauge model shows the bonnet top lining as panels. I and a few others think this is incorrect and that the lining carried across the top of the bonnet as per steam engine boiler bands. Although this is not visible in any photographs of the real locomotive, the bonnet top is a one piece unit that is bolted to the sides and lifts off in one piece. The 'Great Western' text on the cab side sheets is actually a 2mm scale transfer, again from Fox Transfers (FRH2106/1) along with the buffer beam text. The works plate came from Narrow Planet. The cab interior was painted next. With all the painting done and transfers applied, the model was sprayed with Phoenix-Precision Satin varnish. A final touch to the body was the red oil lamp in front of the chimney, supplied by Springside Models. I had intended to use a Digitrax DZ126 decoder in this model, but they were unavailable at the time. Instead, I used a LaisDCC N/Z Gauge two function decoder which just squeezes between the frames under the cab. With all the assemblies now ready, it was time to attach the chassis to the body and fit the roof. The result is, I think, a very attractive and unusual model.
Rear donkey engine side
Rear
Front
|