Steve Johnson Modelmaker
|
|
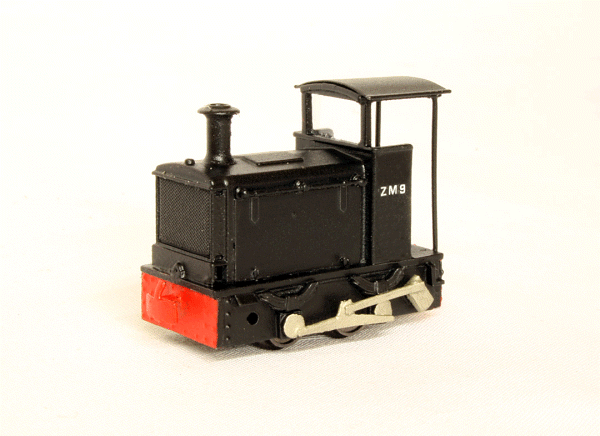
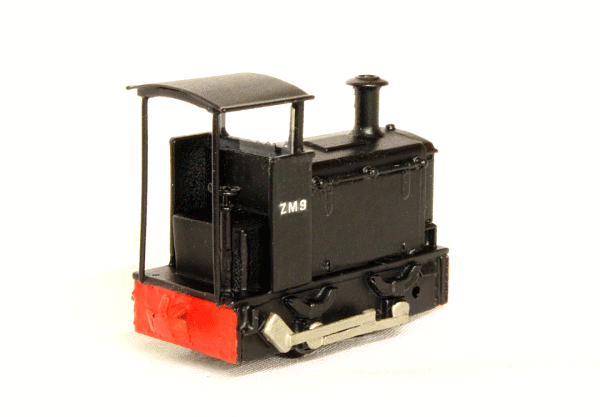
ZM9 Hudswell,
Clarke 0-4-0DM
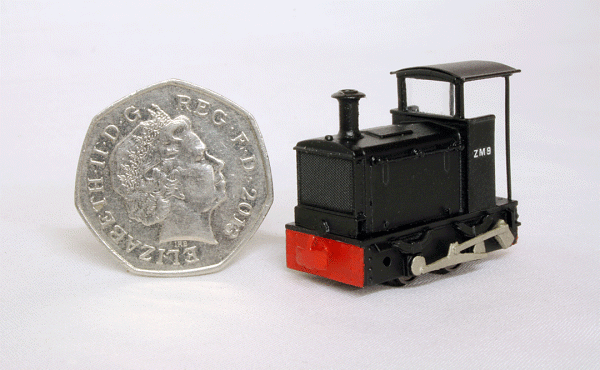
This diminutive 18" gauge diesel was built by Hudswell, Clarke in 1930. Originally numbered 5519 and named 'Crewe', it worked in Crewe Works internal narrow gauge system. It was powered by a 20hp three cylinder McLaren Benz diesel engine driving through a jackshaft and gearbox mounted under the cab. Later, when the Crewe narrow gauge system was abandoned in 1932, it was moved to Horwich Works with its new number of ZM9. Now, this is a small locomotive. A very small locomotive! You can gauge the size with this picture of the completed model next to a 50 pence piece.
ZM9 next a 50 pence piece. Strangely enough, a 4mm scale kit is available for this locomotive. It is produced by 6point5 Minimum Gauge and available through Narrow Planet as a 3D printed body and etched overlays only. It is designed to use the Busch HOf scale NS2f diesel locomotive chassis. This chassis is not strictly correct for this locomotive, but there are not many choices for 6.5mm gauge track.
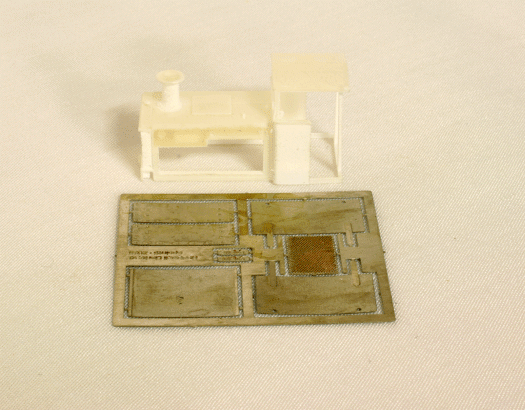
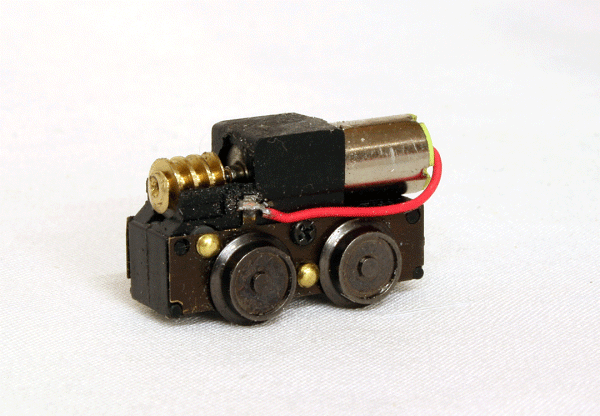
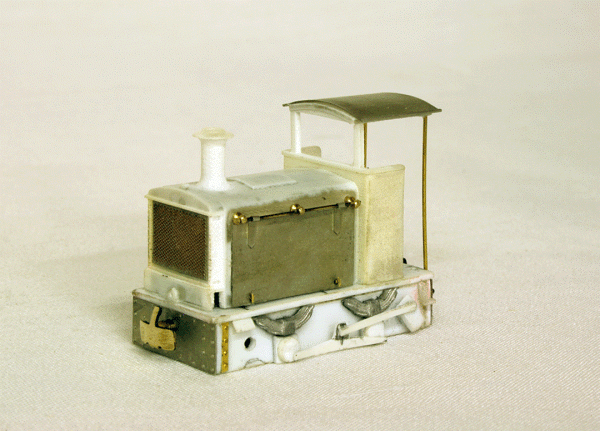
The Kit, printed body and etched overlays I decided I would cheat the gauge here and build it as a OO9 Gauge model. This is so I can run it alongside my other OO9 Gauge stock. The kit is easily and quick to assemble. Just a case of cleaning up the etchings and gluing to the body. The difficulty involves the chassis. As I already mentioned, I was going to cheat and build it as a OO9 gauge locomotive. A hunt around for suitable chassis didn't turn up anything of a suitable wheelbase, which in this case is 3 feet. The nearest I could get was a Tsugawa TU-9A from Plaza Japan. I figured that the wheels might not be too noticeable under the low outside frames. I duly ordered one. The next difficulty is that these chassis are low voltage, 3 volts actually. They also run rather fast. I did come across a Dutch company called Tramfabriek that make replacement miniature 12 volt motors that run slower. I thought I would order one and try it. The replacement motor is lightly longer than the original and ends up protruding slightly more into the cab space.
Remotored Chassis Having re-motored the chassis, I found a huge improvement in performance. With the new motor, the chassis runs slower and has a better control. Also, I don't have to worry about burning out the motor or adding resistor in series. Happy with the chassis, I moved on to completing the body. The kit is designed to fit onto the Busch chassis and therefore does not have a footplate, it is just a body. The Tsugawa chassis is just a chassis, so a footplate needed to be made. This was easily done with cutting out a measured rectangle of plasticard. A rectangular hole was made in the centre to accommodate the motor. The body was then glued to the new footplate. The handrail knob holes were drilled and reamed out to accept the the knobs and wire threaded through. The bonnet side sheets were next with careful attention to the hinges, which fold over the handrails. The cab roof etch has to be rolled to match the profile of the roof and when done, was glued in place. Plasticard buffer beams and outside frames were added below the footplate and the etched beams glued onto the ends.
Body complete awaiting priming The 3D supports for the cab roof rear were now cut off and replaced with 0.4mm wire. This fitted into the thoughtfully provided blind holes in the underside of the cab roof and into holes on the footplate. Outside frame detail was added in the form of springs (cut down wagon springs), hornblocks and axles, rivet strapping, steps and sandbox covers. Now, I would have liked to have a working motion on this locomotive, but unfortunately I do not possess the tools or the skill to do so. As a result, I opted to fit fixed flycranks, coupling rods and connecting rods made from plasticard. It's not noticeable when its not moving! Maybe at a later stage, I'll have a go at working motion! As the locomotive is going to run with my other OO9 stock, I fitted a compatible coupling on the buffer beam. A handbrake standard was added in the cab.
Body now primed Having completed the main body details, I had to address the issue of the motor being visible in the cab area. I figured that I would add a driver and that he would have to sit on something. So I felt that an 'extended' seat/box might cover up the motor and being painted black, would not be too noticeable. This was duly fabricated out of plasticard. The model was then sprayed with grey primer and checked for any remedial work. When happy, I then sprayed the main body with Halfords Gloss Black and the buffer beam with Halfords Volkswagon Mars Red. I had a transfer sheet, intended for Wargamers, left over from my PWM650 project and this contained some very small numbers. Small enough to use on this locomotive. So the number, ZM9, was applied to each cabside. The motion was picked out with Precision Paints Oily Steel. The body now received its final coat of satin varnish.
ZM9 Complete, front view Extra lead weight was added under the bonnet, above the motor and to each side of the motor. Additional weight was added behind the buffer beams front and rear. The cab window was glazed. Now all I need to do is find a driver in a suitable pose and a very small works plate.
ZM9 rear view showing the brake standard and seat/motor cover. Now all complete and with extra weight added, the performance in terms of speed and haulage ability is surprisingly good. All in all a great little kit to build and I'm pleased to have made a model of something I thought I'd have to scratchbuild.
|