Steve Johnson Modelmaker
|
|
LNER
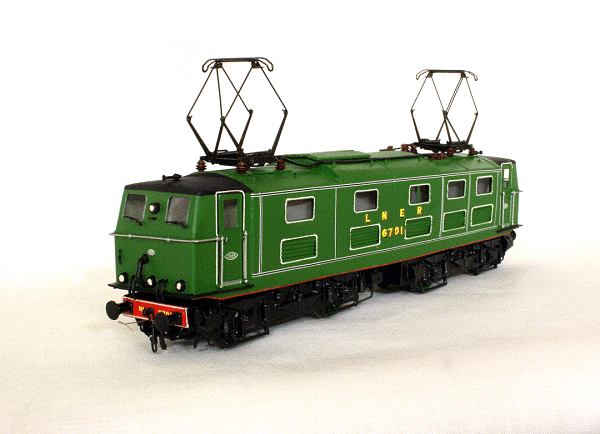
No.6701 (later 6000 then 26000) Bo+Bo 1500V dc Overhead
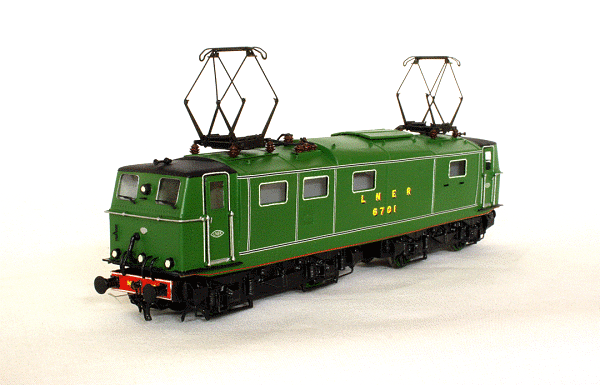
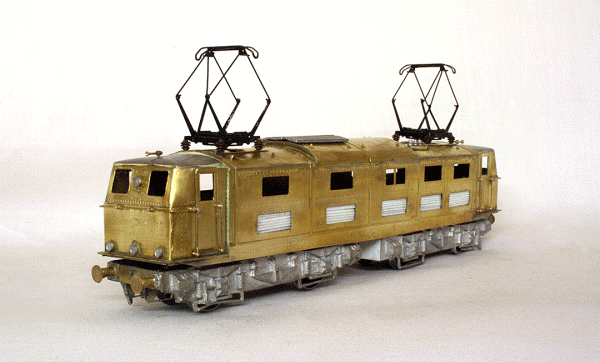
LNER No.6701 'B' Side In 1936 the LNER announced a scheme to electrify the Manchester Sheffield and Wath line using the 1500V dc overhead system, already in use on the Manchester, South Junction and Altrincham line (MSJ&A). The initial proposal was to have 69 mixed traffic locomotives (Class EM1). Tenders were put out for the EM1's in 1937 and Metropolitan Vickers electrical equipment ordered in 1939. World War II halted the scheme and the order was reduced to just one prototype. The design was unusual as the two four wheel bogies were linked together by a coupling (hence the '+' in Bo+Bo). No.6701 was built at Doncaster and completed in August 1940. After a period of trials hauling 6701 with a steam locomotive, modifications were made to the springs. Further trials were carried out on the MSJ&A line. No.6701 returned to Doncaster in 1941 for storage until after the war. No.6701 was renumbered 6000 in 1946, now being classified as Class EM1 (Electric Mixed Traffic). No.6000 came out of storage in 1947 and was later shipped to the Netherlands State Railway. It remained there until 1952 where it gained the name 'Tommy' after the nickname given to British soldiers. 'Tommy' was re-numbered 26000 by British Railways and remained in regular service until March 1970 when it was withdrawn. It was scrapped at Crewe two years later. My take on this model is the MSL kit produced quite a few years ago. I managed to pick up an unmade kit from Hatton's whilst looking for something else. The kit is mainly etched brass with etched nickel silver bogie frames and pantographs. White metal bogie sideframes and cab roofs and some other fittings are also included. Wheels, gears and motor have to be sourced separately. The first problem with this kit is that there were no instructions! This makes it very difficult to build, as you can imagine. I tried to source a copy of the instructions on the usual model railway forums without success. The cabs and main body are separate sub-assemblies. These went together reasonably well. The curved roof over the main body needed a bit of fiddling to fit. With these sub-assembles completed, I attached the cabs to the body. It was quite challenging to get the straight sided cabs to meet the curved body at the bottom correctly. Other body details were added, such as handrails, roof vents and lights. I substituted the supplied cast horns with turned brass versions. One side of the body has a row of five vents. Parts are supplied for this, but it was very difficult to work out how these were supposed to go together. I tried various ways, but gave up in the end and made my own from laminated plasticard! There are numerous other bits of etched brass, but without the instructions, I have no idea what they are for or where they go! I have tried to glean as much information as I could from contemporary photographs, but the quality of these (taken in 1939-1940ish) is not great. Some clues were apparent from looking at details on the production versions, bearing in mind they are not identical. Included in the kit were two brass strips that needed to be folded and soldered to the inside of the body to which the chassis would eventually bolt to. This is a bit of a fiddle as there wasn't a guide as to where to place them to get the ride height correct. A bit of trial and error produced a reasonable compromise with any minor errors to be corrected with shims.
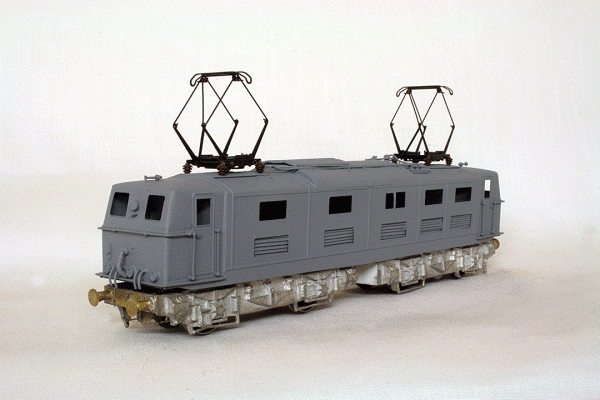
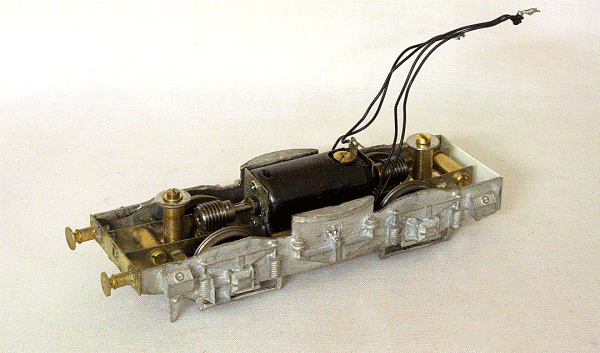
No.6701 assembled and running, obviously more work needed! The bogies consist of two etched nickel silver frames bolted together with 'OO' gauge brass frame spacers. Etched nickel silver spacers are soldered in the frame to act as fixings for the white metal sideframes. Wheels are supposed to be spoked 4ft. 2in. I used some Romford 16mm 12 spoke tender wheels. These are on 2mm axles, so the 1/8th inch axle bearings had to be bushed with 2mm bearings. The frames are quite a bit narrower than the wheels, so 2mm brass shims had to be used to reduce the wheel sideplay. This worked well for the non-driven bogie, apart from now having two eccentric wheels!. The driven bogie also has two tabs for the motor fixing, but without instructions, I didn't know what combination of motor and gears was intended to be used! In the end, I plumped for a Mashima 1426 double shafted motor, for which the can seemed to be the right size with the shafts reaching over the axles. I used Romford '20' series 33:1 gears, which are available to fit 2mm motor shafts and 2mm axles. This was obviously not what was intended as the worms were miles above the axle spur gears. A bit of careful surgery involved the removal of the motor mount tabs and repositioning them lower in the frame so that the gears would mesh correctly. Again, the axles had to be shimmed to eliminate sideplay. The motor bogie was re-assembled and tested. To my disappointment, I had one eccentric wheel! Another axle was sourced and fitted which was also eccentric! Obviously I couldn't have a locomotive bouncing down the track on eccentric wheels, so I ended up replacing them with Scalelink wheels, which worked fine. Electrical pick-ups were fitted to both bogies and all wheels by gluing some copper clad strips to the frames and soldering some shaped phosphor bronze strip to the copper clad suitably bent to touch the wheels. A run on the test track showed everything to be working as expected. Some more work on the body saw the cab door handles added along with the air and vacuum pipes added to the fronts. This pretty much finished off the body as far as I could for now, so it was cleaned up and sprayed with Halfords grey primer. This revealed what other tidying up work needed to be done.
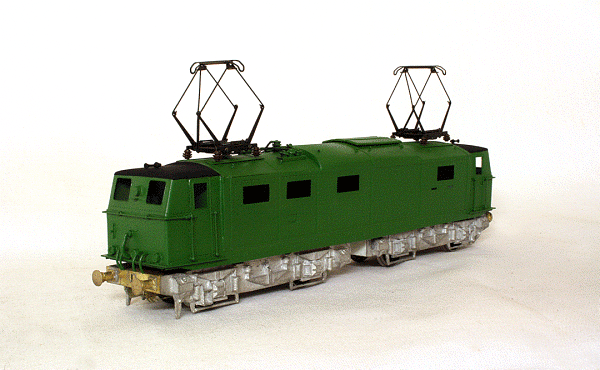
No.6701 in primer. Still a few tweaks needed and underframe needs attention. With the tidying up done, it was time to apply the first coat of colour. No.6701 was painted LNER Doncaster Green. I had a pot of Railmatch Doncaster Green and sprayed the model with this. Well, not the shade I was expecting! Looked more like Landrover Olive Drab! So, back to the drawing board and a pot of Phoenix-Precision Doncaster Green P50 was ordered. The locomotive was duly sprayed, but something went wrong with the spray gun and the finish was awful. This happens very occasionally and there is nothing for it other than putting the model in paint stripper and starting again! This time, the finish was much better.
No.6701 painted Doncaster Green with black cab roofs The locomotive cab roofs were black, which was duly applied. Now, I have noticed some versions of this model feature an all black roof. However, on the photographs I have been looking at, it is only the cab roofs that seem to be black. The central section appears to be green and on photographs, there is not any tonal difference between the bodysides and roof apart from lighting differences. Unfortunately, there does not appear o be any colour photographs in this livery. So, on to the detailing and lining. The locomotive was also lined with the LNER black/white/black lining. This lining was also applied around the windows, ventilation louvres and doors. Fox Transfers General Lining FRH4350/2 was used for the straight lines and FRH43450/4 for the curved sections. The numbers are shaded gold FRH4309. The LNER 'eye' logo on the cab doors are a bit tricky. One reference states the colour as yellow. However, I was unable to find any yellow versions, but did find some white ones on a Fox Transfers pre-nationalisation vehicle set FBNE1. The smaller ones seem to fit on the doors okay. Handrails and front wind screens surrounds seem to be silver whilst the marker lights are black. More attention to the bogies now with the addition of extra detailing under the buffer beam and cab steps. The supplied cast side frames include the guard irons, but these are obviously in the wrong place as they don't line up with the wheels. So they were removed and new ones added more inboard along the the visible transverse brake rigging. One the prototype, the cab steps are attached to to the body. However, this would not work on a model traversing 'train set' curves. So a compromise was made by making up some steps and attaching them to the bogies only close to, but with enough clearance so as to not foul the body as they rotated. Sanding pipes were also added and some of the brake rigging tidied up.
No.6701 Motor Bogie With the bogies finished, the frames were painted black, the beams however, were painted red. The wheels are green. In this livery version, the beams were outlined in white and carried the locomotive number. I used Fox Transfers white lining and the buffer beam numbers were from pack FRH4308/2. The bogies were then varnished before fitting the dummy screw link couplings (Hornby spares) and the Alex Jackson couplings. A finishing touch to the body was to fit some grey painted plasticard strips behind the large bodyside windows to obscure the inside of the body. Cab floors were also fitted as the track was visible through the cab windows! The model is fitted with a DCC decoder, in this case a LaisDCC 860021, which is perfectly adequate for this locomotive. The decoder is mounted on the top of the chassis between the bogies.
LNER No.6701 showing the 'A' side It took a while to build this model, especially without any instructions, but I think it looks like No.6701. This is not the best etched brass kit I have built and did present some challenges along the way. The lining was a little tricky, possibly as it sits on top of some fine rivet detail and consequently doesn't sit flat. In the unlikely event that I were to build this again, I think I might be tempted to remove this rivet detail or maybe try and paint the lining. However, I now have a model of this pioneering locomotive.
Apart from the MSL Kit, the only other offering of this locomotive so far has been from Olivia's Trains. Looking at the photographs it is a little difficult to tell if it is a ready built version of the MSL Kit or a modified Class 76 from their own commissioned range.
|
